Tag Archives: appliance care

Things You Might Be Doing Wrong to Your Oven

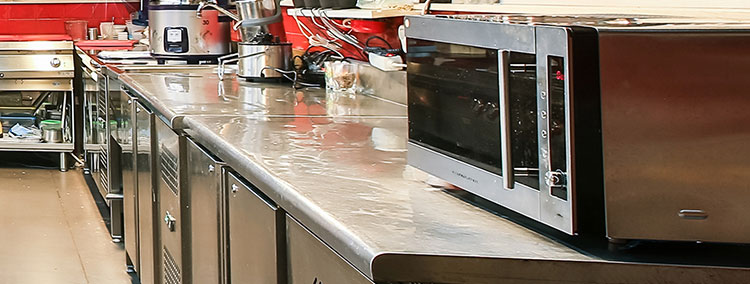
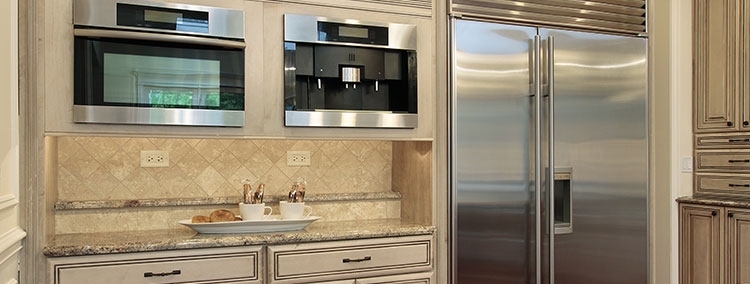
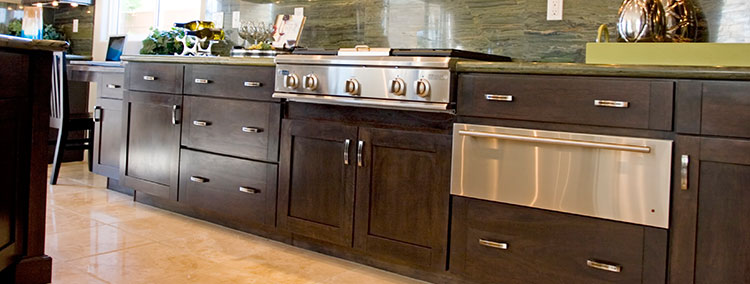
For your oven to continue functioning properly and avoid hiring oven repair professionals every now and then, you need to treat it right. Unfortunately, many homeowners make plenty of mistakes without even knowing. To help you out, here are some of the things you might be doing wrong to your appliance that might be ruining it:

Overloading the unit

Attempting to cook too many things at once reduces your oven’s overall performance and raises the chance of a fire resulting in your home.

If the racks are crammed all the time, the heated air can’t circulate freely. As a result, the unit doesn’t function as properly as it should. What’s the solution? Stagger cooking periods. This means that you should cook your food at different times. Don’t cook all the food at the same time.

To get rid of the need to warm the food, make it a habit to cover the food items with a lid or foil. This will keep them warm on the cooktop and you won’t need to warm them.

Placing a foil at the bottom of the oven

You might have come across information that placing a foil at the bottom of your oven will make future cleaning easier, but this isn’t the case. In fact, it can actually block airflow and interfere with the heating element, causing oven failure or necessitating recalibration, which, as you can tell, means that you have to spend more money on the unit.

Instead of placing a foil at the bottom, simply clean your oven on a regular basis (such as weekly wipe-downs with a damp washcloth) to keep the inside sparkling clean.

Ignoring the rust on the racks

It’s normal for the racks on your oven to develop rust over time. This rust not only poses danger to your baking dishes, but the rust can chip off, increasing the risk of your racks catching fire.

Unfortunately, many homeowners ignore this as they think that the rust is harmless. This is wrong. When you spot rust on your unit, clean it using a nonabrasive scouring pad and a solution of soapy water and vinegar.

This will soften the rusty flakes and prolong the life of your oven racks.

Failing to treat the door with the care it deserves

Occasionally, when cleaning the door, homeowners get overly enthusiastic and vigorously scrub the glass, damaging it. This is worsened when they use hard materials instead of soft items such as a sponge, for removing the grime.

Scrubbing, slamming the oven door accidentally when your hands are full, and using the door to temporarily store hot pots before placing them on the kitchen table can all contribute to the formation of micro-fissures in the glass, which may eventually cause it to break or even explode.

To avoid all this, handle your oven door gently. If you notice a problem with it, regardless of how minor it is, fix it immediately. You can work with professionals, or if the problem is minor, you can do it yourself.

Spraying the knobs with a cleaner

The act of immediately misting home cleaner on the controls is one of the most crucial habits to eradicate. The liquid could easily get behind the knobs and switches and short out the control panel. To avoid shorting, use a rag sprayed with liquid cleaning and rub the controls.

Failing to clean the oven when you are supposed to

The heat sources in the oven may not be able to fully preheat the oven due to dirt accumulation. In addition to making your oven work more than necessary, this could result in undercooked food.

To avoid this, you should regularly clean off the burned-on foods from the racks, floor and walls. This will save you the hassle of having to unblock the heating elements and allow them to run efficiently.

To be on the safe side, make it a habit to clean your oven at least twice a month. If there are spills in the oven, move with haste and get rid of them as soon as possible. Don’t let them sit there for too long than they should.

Overrelying on the self-cleaning feature

Though useful, you shouldn’t use the self-cleaning feature in place of routine cleaning. You also shouldn’t use it on highly filthy ovens.

Out of laziness or busy schedules, homeowners procrastinate the cleaning of their ovens. Many opt for the self-cleaning option, only to realize it’s too late.

You can see smoke during the self-cleaning procedure if the dirt and residue have been accumulating for some time. A fire may even break out in such a situation.

Furthermore, the self-cleaning function is taxing on your appliance because it heats the oven to 500–600 degrees for two hours. This not only reduces the life of the appliance but also leaves you with a huge energy bill.

As a general rule of thumb, you should minimize the frequency of use of the self-cleaning feature. And when doing it, ensure that you are doing it right by following the manufacturer’s instructions.

To be on the safe side, use this feature once or twice a year. Don’t use it whenever you want to clean the oven, as it will most likely lead to more harm than good.

Leaving the racks on during self-cleaning

One common mistake many users of the self-cleaning feature make is failing to take out the oven racks before starting the cycle.

Because residue tends to build up on the racks during regular oven use, removing them beforehand helps extend the life of your racks and possibly assist to lessen the strong chemical scent when utilizing the self-cleaning feature. Unfortunately, many homeowners forget to remove them.

Removing the metal racks from the oven completely and soaking them in hot water with a small amount of dishwasher detergent is the most effective way to clean them.

After letting them soak for two hours, use a stiff brush to clean the racks; make sure to rinse and dry them before putting them back in the oven.

Failing to install surge protectors

If you haven’t installed a surge protector, a thunderstorm or lightning strike poses a serious risk to the operation of your electric oven.

To protect it—or any other appliance from extreme weather and excess voltage, have a surge protector in place during the installation of the device.

This will keep your unit in top shape and you won’t need to hire an appliance repair Alexandria professional to fix it for you.

Guide to Getting rid of Unpleasant Odors from Your Fridge

Are you tired of opening your refrigerator and being met by foul odors? A bad-smelling fridge is not only unpleasant, but it also indicates the presence of bacteria and mold. But don’t worry; there are simple and efficient techniques to get rid of those unpleasant odors and restore the freshness of your refrigerator. Some of the ways you can go about it, as given by refrigerator repair professionals, include:

Empty and declutter the fridge

Begin by emptying your refrigerator of all items, including expired food, leftovers, and other potential odor causes.

You should throw away everything that has gone rotten or is no longer required. Doing this helps you to identify and concentrate on the source of the odor.

After removing all the items from the fridge, clean it. To clean the internal surfaces of your refrigerator, combine mild dish soap and warm water. Pay specific attention to spills, stains, and crevices, which can harbor bacteria and odor-causing agents. Rinse and thoroughly dry the surfaces with clean water.

Use natural deodorizers

Keep a bowl of baking soda or activated charcoal in your refrigerator to absorb odors. These natural deodorizers operate by neutralizing and trapping odors. To keep the baking soda or charcoal effective, replace it once a month or as needed.

Besides baking soda and activated charcoal, other products that you can use to absorb the odors include:

Coffee grounds: Because of their strong aroma, used coffee grounds can work as a natural deodorizer. Place used coffee grinds in an open container or coffee filter in the refrigerator. Coffee grounds assist in masking off-putting odors. For the best outcome, change the grounds every 1-2 weeks.

Lemon or citrus peels: Citrus fruits have a pleasant aroma that might help to mask odors. Put some lemon or orange peels in a bowl or on a platter in the refrigerator. Citrus oils in the peels mask and absorb undesirable odors. Every 1-2 weeks, replace the peels.

White vinegar: Vinegar is known for its deodorizing abilities. You need to wipe off the inside of the refrigerator with equal parts water and white vinegar solution. This assists in eradicating odors and disinfecting surfaces. Before replenishing the fridge, allow the vinegar to drain and air out.

Vanilla extract: Vanilla extract provides a lovely aroma that you can use to refresh your refrigerator. Dab a few drops of vanilla extract on a cotton ball or a little piece of fabric. Refrigerate it to give it a pleasant aroma. Every few weeks, replace the cotton ball.

Essential oils: To a cotton ball or a tiny piece of fabric, add a few drops of your favorite essential oil, such as lemon, lavender, or eucalyptus. Put it in your refrigerator to infuse it with a lovely scent. For the best outcome, renew the essential oil regularly.

Properly store the food.

You must ensure that all food is firmly wrapped or stored in airtight containers. This keeps strong odors from penetrating the refrigerator and helps keep it fresh. To seal leftovers and other food products, use plastic wrap, zip-top bags, or storage containers.

You should keep the perishable goods at or below 40°F (4°C): To inhibit bacterial growth and protect food quality, keep the refrigerator temperature to or below 40°F (4°C). You need to check the temperature with a refrigerator thermometer and make the necessary adjustments.

Store raw meats, poultry, and shellfish on the bottom shelf or in a separate drawer to avoid cross-contamination. Place these foods in airtight containers or plastic bags to keep juices from spilling onto other meals.

You should properly use the different refrigerator zones. To help you out, here is a guide on how to organize the different fridge sections:  

Higher shelves: Store ready-to-eat meals on the higher shelves. These shelves are best reserved for leftovers, cooked dishes, and drinks. These meals require less cooking and have better safety margins.

Lower shelves or drawers: Keep raw meats, poultry, and shellfish in these sections to prevent drips from contaminating other foods. This zone is also suitable for storing dairy goods such as milk and yogurt.

Door shelves: Due to frequent opening and closing, anything stored in the refrigerator door may be exposed to slightly higher temperatures. Keep condiments, sauces, and other foods with high acidity in the door since they have a longer shelf life and are less likely to spoil.

Have a fridge cleaning schedule.

You should have a cleaning schedule for your refrigerator. Aim to clean your unit at least once a month or more frequently if necessary. Regular maintenance prevents the accumulation of odor-causing substances and aids in the upkeep of a clean and fresh-smelling unit.

The beauty of cleaning the appliance is that you don’t need to hire a professional to help you with it—you can easily do it on your own.

As a rule, avoid using harsh chemicals that can ruin the appliance.

Check the drip pan and drain.

Odors can occasionally be caused by a clogged or dirty drip pan or drain. Consult your refrigerator’s owner’s manual for instructions on how to reach and clean these components. Taking care of them can help prevent the development of unpleasant odors.

The drip pan is at the bottom of the refrigerator, behind the front grille or kick plate. If you can’t find it, consult the owner’s manual for your refrigerator.

Before proceeding, disconnect the refrigerator or switch off the electricity to avoid any electrical dangers.

When you find the drip pan, carefully slide it out of its place. Be cautious, as it may contain contaminated water or residue.

You should empty the drip pan contents into the sink or a suitable container. You can rinse it with warm, soapy water or clean it with a mild cleaning solution, depending on the level of dirt and grime.

Scrub away any residue with a sponge or cloth, then thoroughly rinse. Before putting it back in the fridge, ensure it is fully dry.

There you have it.

Following these basic suggestions will efficiently remove odors from your refrigerator and enjoy a fresh and pleasant-smelling atmosphere for your food storage. Remember to practice good cleanliness and careful food handling to avoid recurrent odors.

For peace of mind that your unit is in top working condition, have it inspected by an experienced commercial appliance repair Alexandria professional at least once a year.

Parts that Commonly Break in Different Appliances

Are you wondering which are the common parts that break down in your appliance? Here they are as given by appliance repair professionals:

Refrigerator

The ice maker draws water into uniform ice molds. Once the cubes have formed, the molds are heated or twisted to release the ice, and a sweep arm ejects them into a container to be distributed as needed.

In the refrigerator, this is the most common part that breaks down. 

Problems with the water supply are the most common reasons ice makers stop working. Ice makers require a constant supply of water to function effectively. 

The ice maker may stop working if there is a problem with the water supply, such as a plugged or frozen water line. Examine the water line to ensure it is correctly connected and not kinked or blocked.

The water inlet valve controls the water flow into the ice maker. Water may not reach the ice maker if the valve is faulty or obstructed. This can result in no or insufficient ice production.

Ice can collect and jam the ice maker mechanism over time, preventing it from working correctly. This can happen in the ice mold, the ice chute, or the water line, causing the ice-making process to slow.

Regardless of why your ice maker isn’t working, you should try out troubleshooting methods specific to your model, listed in the user handbook.

If the problem persists, it is recommended that you contact a professional technician or the manufacturer’s customer care for assistance.

Dishwashers

In most cases, you won’t notice most dishwasher problems immediately. Your dishwasher will gradually stop washing well until you’re fed up and wondering what’s happening.

The most common problem with dishwashers are clogged filters and spray arms. Over time, dishwasher filters and spray arms get clogged with food particles, debris, or hard water deposits. 

When these components get clogged, water flow is impeded, resulting in poor cleaning performance or a dishwasher that won’t finish a cycle.

In other cases, the problem is brought about by overloading the unit. Overloading or poorly loading the dishwasher can obstruct the spray arms, prevent adequate water circulation, or interfere with the operation of other components.

To avoid damaging your dishwasher, follow the manufacturer’s instructions when loading your dishwasher.

In rare cases, your impeller will break. The impeller is the pump that creates the water pressure required to spin the spray arms. 

If a seed, pit, or piece of glass gets inside the pump, it might cause harm. You should address this problem as soon as possible.

This can cause water to flow into the motor and onto your floor. How will you know if your impeller needs to be replaced? There will be a loud rumbling noise.

As mentioned, you should move with haste and fix it before things turn for the worse.

Washers

The most common parts that break in a washing machine are: 

The door or lid switch: Prevents the drum from spinning until the door or lid is shut.

The drain pump: It is responsible for removing water from the drum.

Tub bearings Keep the tub in place and allow it to spin smoothly.

When your washing machine has problems, it will make squealing and knocking sounds. 

A worn or loose belt often causes a squealing noise. The belt that drives the drum might have become worn or slack over time, causing it to slip or squeak. This problem means it’s time to get a replacement for the belt.

You will hear the sound if the motor is malfunctioning. You should contact a professional technician to inspect and repair the motor in such instances.

Knocking sounds often come about due to loose or damaged parts. Check for any things that might have fallen into the drum or trapped between the drum and the tub, such as buttons or coins. 

Unsecured drum paddles or tub mounts might cause knocking sounds during the wash cycle. Find out where the noises are coming from.

Dryer

The common parts that break in the dryer are: 

Thermal fuse: Prevents overheating of the appliance.

A wire coil in an electric dryer or a burner in a gas dryer serves as the heating element.

A continuous piece of felt wrapped around the rim of the drum allows it to spin while controlling airflow.

The beauty of most dryers is that they are often well made, and as a result, there are relatively few dryer problems that cannot be fixed—it is uncommon to have to replace the entire unit due to this problem.

How to ensure your appliances last for a long time

You must do several things to prevent your appliances from breaking down often and ensure they last for a long time. These things include: 

Ensure that your appliance is properly installed. This calls for you to follow the manufacturer’s installation instructions. Remember that improper installation can cause problems with performance or even damage the unit. After buying the unit, take time to find an experienced professional to help with the installation. Don’t hire just anyone. 

Because appliances are susceptible to power fluctuations, it is critical to ensure that you have a stable power source. Use surge protectors or voltage stabilizers to safeguard your appliances from voltage spikes and electrical surges.

Keep your outside and inside appliances clean by regularly wiping off surfaces and following the cleaning recommendations. Remove any accumulated dust, grime, or debris to ensure proper functioning.

It’s wise to have a maintenance routine for each of your appliances. Regularly inspect and clean filters, vents, coils, and other components during maintenance, as directed in the user handbook.

Also, arrange for professional servicing or tune-ups to keep the appliances in good working order.

As a rule of thumb, ensure that the servicing is done by an expert commercial appliance repair Springfield who knows what they are doing. 

Regardless of how versatile an appliance can be, use every appliance for its intended purpose and only utilize it for tasks it was not built for. For example, don’t use a dryer as a heater.

8 Mistakes You are Making with Your Dishwasher

A dishwasher is one of the most commonly used kitchen appliances, and it saves you time and effort when dishwashing. 

To keep your dishwasher running smoothly, you must avoid making dishwasher mistakes that households make daily.

The mistakes you should avoid, as given by appliance repair professionals, include: 

You don’t read the instruction manual.

Many people have the impression that every dishwasher is the same. Due to this, they don’t bother reading the manual for their specific model as they think it’s unimportant.

Each dishwasher has a slightly different set of needs and ways of working.

One example is the type of things that each device can handle. When you don’t read the owner’s manual before using the appliance, you won’t know the items you can clean using the unit and those you can’t.

To stay safe, read the instructions before putting the different items in the dishwasher. 

Don’t put anything in the dishwasher if the manufacturer doesn’t say that it can go in.

Failing to run hot water beforehand

You might miss out if you don’t run your hot water tap before using the dishwasher. This might sound strange, but it’s true.

Running hot water before you start to use the dishwasher can ensure that the water going into the dishwasher is already hot, which can help it clean better.

Cold water can leave behind leftover soap and food. To stay safe, turn on the hot water at the sink and let it run for a few minutes.

Failing to leave the door open after a cycle

Just like with a washing machine, you should leave the dishwasher door open after using it so it can dry properly.

This is a great way to avoid mold, especially on the caps.

While this is a great practice, in most cases, many homeowners don’t do it often because they don’t know it’s the right thing to do. Others don’t know that they should do it. 

To stay on the good side, make it a habit to leave the dishwasher door open after running a cycle.

Overusing the eco mode

Eco mode or energy saver mode on your dishwasher can only be good for you and your appliance, right? Well, this is not true. Even if the mode saves energy by running at lower temperatures, setting your dishwasher to only run on eco mode could be a mistake that could hurt you in the long run.

Some people only use the eco or energy saver mode on their dishwashers because they think it would save them money and be better for the environment. Unfortunately, this isn’t always the case.

Running your unit only on eco mode could cause problems because the water might not get hot enough to dissolve all the soap. Soap can build up over time, leading to problems like leaks and damage to the dishwasher.

To prevent this, occasionally use the dishwasher’s highest temperature setting to keep it clean and ensure soap doesn’t build up.

Overloading the dishwasher compartments

One of the most common mistakes homeowners make when using their dishwashers is to put too many dishes, pans, glasses, and silverware in them.

Why does this matter so much? If you put too many things in your dishwasher, it won’t clean as well as if you left more room between them. Overloading your dishwasher can make your dishes have a foul smell and less clean.

To avoid this, load your dishwasher correctly, leaving enough space between the dishes so the water and soap can move around properly during the cleaning cycle.

Failing to clean the dishes

Some experts advise that you don’t need to clean your dishes before putting them in the dishwasher, but this is controversial.

You should know that your dishwasher isn’t a trash can or a garbage disposal. This means that you shouldn’t allow all the trash to get there. 

One of the biggest mistakes you can make when using the dishwasher is failing to scrap off bigger bits of stuck-on food or sauce, as these leftovers could linger.

Even though dishwashers are made to clean dishes, you should still scrape and rinse dishes before putting them in the dishwasher. If you don’t do this, bits of food will get stuck in your dishwasher and won’t clean your dishes.

This means you’ll have to clean your machine more often in the long run.

You don’t need to pre-rinse your dishes, but you should scrape off any stuck-on food. This way, you have fewer food particles getting into your dishwasher. 

Failing to clean the filter

It’s easy to forget or not even know that the dishwasher has a filter, but it does, and it does a great job of keeping your dishes clean by filtering out dirt and waste.

A dirty filter could be why your dishes come out of the washing with a film on them, and your glasses look cloudy.

Because of this, you need to clean it regularly. How often you clean it will depend on how often you use your machine. Once a week is suitable for some homes, but once a month is good for others.

You should research and find out the best time to do it. It also doesn’t hurt to consult an experienced dishwasher repair Springfield professional.

Failing to clean the dishwasher deep

Even though you should clean the filter often, you should also deep clean the dishwasher every so often.

You can do this by running a dishwasher cleaner or a bowl of white vinegar on the bottom shelf while the dishwasher is empty.

Doing this eliminates the limescale, food, and grime that have built up in your dishwasher.

It will keep your dishwasher from getting smelly, make sure your dishes get clean, and make the machine work better.

For the best outcome, deep clean your appliance at least once a week. You can do the cleaning yourself, but if you don’t have the time or aren’t sure about your skills, let an expert do it.

Secrets to Keeping Your Appliances in Top Shape

Whether it’s a refrigerator, washing machine, or any other appliance you have in your home, you want it to last for as long as possible, don’t you? The cool thing is that it’s possible to do it. Here are tips given by appliance repair professionals that will ensure that your appliance lasts for as long as possible:

Pay attention to the instruction manual

If you are like other homeowners, you don’t even pay attention to the instruction manual. You look at it once, then throw it in the trash can, don’t you?

Don’t do this for your appliance to last a long time. Besides the manual telling you how to use your appliance properly, it also contains information on how to use it correctly so that it lasts for a long time.

You should regularly refer to the manual to know how to keep it in top shape.

Don’t overload the appliance.

Whether it’s the washing machine, refrigerator, dishwasher, dryer, or any other machine, you should never overload it.

You might have the impression that stocking more items in an appliance will save you time and money, but this isn’t the case in most cases.

When you put more clothes in the washing machine, the machine doesn’t run the cleaning cycle as well as it should, resulting in some of the clothes being dirty. As you can guess, this forces you to repeat the cleaning.

The same thing applies to the refrigerator. When you stock too much food there, you prevent the effective flow of cold air, which leads to some of the food getting spoilt, which, as you can guess, is costly.

Put only the required items in your appliances to stay on the safe side. Never overload them.

Keep the appliances clean.

Clean appliances are beautiful to look at and last for a long time, so you should strive to keep your appliance clean at all times.

The beauty is that you don’t need to use specialized cleaning materials—the good old soap and water is often enough.

To have an easy time, clean your appliances immediately after using them, then at least one thorough cleaning, once a week.

If there are hard-to-remove stains, remove them using vinegar or other tough material.

As you clean the appliances, pay close attention to the smells and ensure that you remove them.

Repair the appliances

Even the best-maintained appliance will break down at a certain time. When this happens, you should move with haste and fix it before the problem worsens.

Some homeowners ignore minor issues with their appliances, which is dangerous as these issues worsen over time and become hard to handle.

To stay on the safe side, fix even the smallest problem as soon as you notice it—don’t let it sit, hoping it will go away.

For peace of mind, ensure that the repair work is done by an expert that knows what they are doing.

As the contractor repairs the appliance, they also should inspect the unit for any other issues it might be having and fix them.

Use the right accessories.

Every appliance comes with its requirements and specifications. For example, a juicer should have the correct juicer attachments for it to function at an optimum level. The same thing applies to the sandwich toaster. To properly cook the bread, you must place it in the right slot.

For your appliance to last for long, you need to use the right accessories. This means that the manufacturer should recommend the power appliances, replacement parts, and other accessories.

Don’t mishandle your appliance.

The same way you don’t mishandle your car is the same way you shouldn’t mishandle your appliances. This means that you shouldn’t bang your refrigerator door. You also shouldn’t close the washer door with your leg.

Sometimes you will find that you can’t close your washing machine as well as you used to. If this happens, don’t force the door to close. You should realize that this happens when you have a problem, and you should find the source instead of forcing the door to close.

If you have encountered a similar problem before, you should try to fix the issue, but if the problem is new, let an experienced commercial appliance repair Springfield professional help you.

Dishwasher Repair: How Do I Get My Dishwasher To Clean Better?

dishwasher repair

A dishwasher is like an extra set of hands that makes your work easier, and your day a whole lot better.

If you have had your appliance for a long time, you must have noticed its efficiency dwindling, and you must be asking, how do I get my dishwasher to clean better?

Well, you are on the lucky side as dishwasher repair professionals report there are plenty of ways you can do it. Here are some of these ways:

Scrape off the leftovers

As much as you don’t want to touch the dishes when they get dirty, you should note that the efficiency of the appliance is significantly compromised when you deposit too much food residues into the system.

For your appliance to clean the dishes better, scrape off all the extra food from the plates before you put them in the dishwasher.

Some people go to the extent of pre-rinsing the dishes, but you shouldn’t. When you pre-rinse the dishes you not only give yourself extra work, you also reduce the efficiency of the appliance as the detergents don’t have enough space to adhere to in order to clean the dishes effectively.

Use hot water

Just like when cleaning the dishes by hand, hot water cleans the best, so ensure the water getting into the dishwasher is hot enough. Before you start running the appliance, check the temperature of the water at the kitchen faucet using a meat or candy thermometer.

For effective cleaning, the temperature should be 120 degrees. Adjust the setting accordingly.

Keep the dishwasher clean.

You should keep the dishwasher clean all the time. Regular cleaning eliminates stuck-on-food particles, mineral buildup, and residual detergents. To clean the dishwasher, run it on a normal cycle using two cups of white vinegar.

You should then wipe down the interior wall and racks with a solution of baking soda and vinegar. Once you are done, rinse thoroughly.

Soften the water

Do you live in areas with hard water? You should note that hard water tends to leave ugly residues on the glasses and plates. No amount of cleaning will leave the dishes sparkling unless you soften the water.

To soften the water, buy and install a water softener, and you will prevent stains and minerals from building up.

Load the dishes appropriately.

Sometimes the dishes will fail to clean properly if they aren’t correctly loaded in the dishwasher. For optimum results, follow the manufacturer recommendations for loading the appliance. As a rule of thumb, never overload the appliance as you will block the spray arm and prevent the water from reaching all the surfaces.

Use the right amount of soap.

Soap is necessary for clean dishes, but when you use too much of it, you end up with dirty dishes. For the cleanest clean, always pour the detergent into the built-in measuring cup inside the dishwasher. This way, you ensure that you are always using the appropriate amount.

Always ensure that you use the right soap for the work. As a rule of thumb never use dish soap designed for hand washing in the dishwasher.

Use the right cycle

Dishwashers come with different cycles aimed at different dishes. The regular cycle is for normal cleaning, the heavy-duty cycle for deep cleaning, and the light cycle for fragile items.

For effective cleaning, be aware of the items you are cleaning and ensure you are using the right cycle.

Inspect the dishwasher for clogs

It’s normal for clogs to develop in the spray arm and the drain, and as you might have guessed, they prevent the dishwasher from functioning optimally. Now and again, check the holes in the spray arm and ensure they aren’t clogged with food residues or hard water minerals.

To dislodge the particles, use a toothpick or needle. While you are at it, check the trap and drain to ensure that food scraps or other objects aren’t blocking the area.

You can do the work if you have the skills but for ideal results, let an appliance repair Northern VA handle it for you. When hiring the contractor, ensure they are experienced and certified to work in your local area. In addition to unclogging the appliance, they also should inspect other areas and fix them if problematic.

Appliance Repair: 7 Reasons Your Fridge Isn’t Cooling Food

One of the major problems with refrigerators is failure to cool food. According to appliance repair professionals, the problem comes about due to many reasons that include:

Failure to plug in the refrigerator

you or someone else might have mistakenly unplugged the fridge. since there is no power reaching the refrigerator, it doesn’t cool food. Before you rush to a conclusion the appliance is faulty, check whether the refrigerator is properly plugged in. To fix the problem, you only need to plug in the appliance and continue cooling your food.

Improperly set thermostat

The fridge might also fail to cool food when the thermostat isn’t correctly set at the right temperature. If the appliance is plugged in but not working, check the thermostat. If you have a side-by-side freezer, the thermostat is most likely located at the back. On the other hand, if you have an over-under fridge, the thermostat is located under the refrigerator.

Locate the thermostat and check the temperature settings. You should then adjust it accordingly.

You have a problem with the compressor

From its name, the compressor compresses and pushes refrigerant vapor into the coils outside the refrigerator. The pressure and pushing create heat that forms hot gas that later cools and absorbs heat from the fridge and freezer.

If the freezer fan is running, but the fridge isn’t getting cold, the compressor might be the problem. The compressor is located behind the refrigerator and at the bottom. To access it, pull the refrigerator away from the wall.

To fix the problem, get a new compressor relay then test it with the current compressor. If the problem is with the compressor, you have to replace it. Connect the new appliance to the suction line, process line, and discharge line.

Problem with the evaporator fan

The evaporator fan blows cool air you feel when you open the refrigerator door. The fan pulls air across the evaporator coil, cools it, and then pushes it across the freezer and refrigerator. If the evaporator doesn’t work at the same time as the compressor, it won’t produce cool air.

The evaporator fan is located behind the freezer wall. You need to empty the contents of the freezer and shelving before you access it.

In most cases, if the fan isn’t working, you have a problem with the motor. Install a new motor then insert fan blades. You can do the work by yourself if you have the skills, but if you have never done it before, let an expert handle it.

Presence of a lot of food

If you have plenty of food boxes blocking the vents, cool air won’t circulate the fridge as well as it should. To fix the problem, organize the fridge or get rid of any food that could be blocking airflow and preventing the refrigerator from cooling.

This is easy to do, and you don’t even need a professional to help you out.

Problem with the condenser fan

The role of the condenser fan is to cool the compressor and condenser coils. In a properly functioning refrigerator, the fan should run when the compressor is running. If the fan isn’t working correctly, the refrigerator temperature can rise and overheat the compressor.

In most fridges, the condenser fan is located in the bottom cabinet. Only a few refrigerators will have condenser coils here instead of the fan.

For you to fix the problem, ensure the fan is spinning freely, and any objects are not obstructing it. If there are blocking materials, you have to replace the condenser fan motor. All you need to do is to buy a new motor from your local store and install it.

If you have the skills, you can install it by yourself, but if you have never done it before, ask a professional to help you out.

Failure of the air dumper to open and close properly

When the air damper doesn’t open or close properly, it impacts the temperature of the refrigerator. When the damper doesn’t open, cold air doesn’t travel from the freezer to the fridge hence making it warmer.

To fix the problem, remove the old air damper and replace it with a new one. You can remove it by yourself or hire a refrigerator repair Northern VA professional to help you out.