Tag Archives: appliance repair company

Why Does a Refrigerator Stop Getting Cold?

appliance repiar

A refrigerator that is not cooling has the potential to ruin your food and incur high energy costs. If left untreated, it may cause irreversible damage to your equipment.

According to the FDA, the recommended temperature for a refrigerator is 40°F or below, while a freezer’s temperature should be 0°F.

If you have turned on your appliance but it’s not cooling, this can be due to several issues. Some of the issues that might be causing this problem include:

The condenser coils are dirty

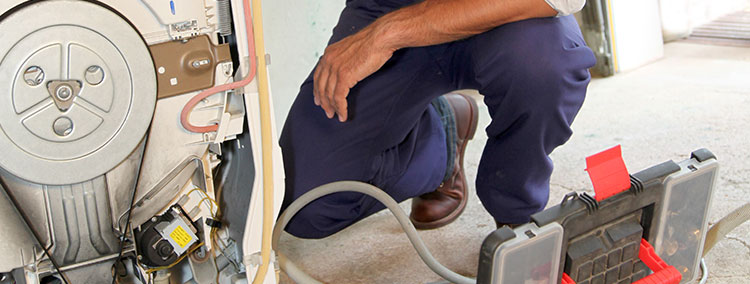
When the condenser coils on the rear of the refrigerator become dusty or coated with spiderwebs, the device cannot cool effectively. According to appliance repair professionals, one of the simplest maintenance tasks you can perform on your refrigerator is to remove it and clean the condenser coils at least once every six months.

To remove the condenser, unlatch the anti-tip brackets on the cabinet’s exterior bottom front. You should then slide the refrigerator out carefully and clean the coils using a hand attachment from a vacuum cleaner.

When doing it, be careful not to bend or damage the coils.

If you have pets, consider pulling out the refrigerator and cleaning the coils more often, as plenty of fur is lying around.

The fridge isn’t plugged in.

While it may appear obvious, one of the most ignored troubleshooting procedures when diagnosing a faulty refrigerator is to ensure it is correctly plugged in, especially if you are returning after a vacation or lengthy absence.

To fix this, you should check the electrical outlet and ensure the refrigerator is properly plugged in.

Replace the damaged power cord with a new one to guarantee a secure and effective connection.

Also, ensure that the circuit breaker linked with the refrigerator is not tripped, as a tripped breaker can disrupt power flow.

Door gaskets are dirty.

The flexible door seals (gaskets) might get dirty over time due to food or fingerprints, preventing the door from properly sealing. To fix this problem, clean the gaskets with a sponge and warm soapy water.

Also, clean off the areas of the fridge where the gaskets meet.

You should avoid using abrasive cleansers, brushes, scouring pads, flammable substances, or window cleaning sprays, as they can harm the appliance, and you don’t want this.

The thermostat is broken.

When you have this problem, the fridge will be reasonably cool and operational but not as cold as you would want.

Your refrigerator has a thermostat that may be turned up or down to suit your preferences.

Check the thermostat to ensure it wasn’t unintentionally turned down, resulting in a tepid fridge that consumes all the electricity. If your thermostat stops working, you should get a replacement.

There is no power getting into the fridge.

When you open the fridge door, and no light comes on, no power is entering your fridge.

This may sound simple, but make sure the refrigerator is plugged in. And if it is, make sure it is receiving power.

Sometimes, the problem is this easy, so don’t ignore it. Perhaps you bumped the fridge while cleaning, and it came unplugged. If it is plugged in, the outlet may have a problem.

You can look at it by yourself or ask a professional to give it a look.

Food items are blocking the air vents.

Most refrigerators receive chilly air from vents in the freezer area, regardless of where the freezer is located.

Unfortunately, food items inside the refrigerator part of the appliance may be preventing the cold air vent from allowing cold air to pass through.

To fix this problem, find the bulky boxes or bags that may have been accidentally placed in front of the vents, preventing cool air from entering the unit.

Pull those items aside or move them to a different shelf.

You also should check if there is any ice blocking the vent. If so, gently chip it away while checking the device’s temperature.

The fridge doesn’t have enough food items.

Mass (food) in the refrigerator contributes to its cooling. Understocked refrigerators can have temperature difficulties and must work harder to maintain cool temperatures. On the other hand, well-stocked (but not overstocked) refrigerators contain enough mass to maintain cool temperatures.

You should keep your refrigerator roughly three-quarters full of food and liquids to ensure proper air circulation.

You should place a couple of water pitchers in the refrigerator’s empty corners to help it stay chilly.

Do not overfill your fridge because products require air movement to remain properly cold.

The evaporator fan is frozen.

When you are having this problem, you may hear a screaming sound that becomes louder when you open the freezer door.

The evaporator fan is normally situated at the back of the freezer, alongside the evaporator coils, and circulates air as the coils work to remove heat.

To access the fan, unplug the refrigerator and remove the cover inside the freezer, just like you did with the evaporator coils. If it is covered in frost, you must remove and defrost it.

You have placed the fridge in a cold area.

Where you place your refrigerator in a warm or cold environment, such as outside or in a garage, you might impact its cooling ability.

A too-cold garage will confuse the fridge and prevent it from cooling its contents. If the garage is too hot, the refrigerator will work overtime to chill the interior.

Even if the fridge is in good working condition, hot appliances near it, such as dishwashers, stoves, or ovens, can interfere with its cooling.

You should put a heat-insulating material on the refrigerator wall to shield the fridge from the stove’s heat.

When cooking, use your kitchen fan to keep the temperature down.

To keep the refrigerator separate from other hot appliances, refrigerator repair Springfield technicians recommend that you surround it with a bespoke enclosure. This is also a solution for a fridge in a garage with high temperatures.

Common Appliance Problems and How to Deal with Them

Appliances break down every time, and the problems range from minor issues to complex ones. There are different ways of dealing with these problems. Some of the problems are minor, and you can have them fixed with the help of an appliance repair professional, while others require you to replace the entire unit.

To help you out, here are some of the common appliance problems and how to deal with them:

The freezer not maintaining the correct temperature

This could indicate a problem with the door seal. Check for tears, warping in the corners, and even areas where the seal has hardened. You can replace it yourself.

Sometimes it’s as simple as removing the old one, but you may need to unscrew several screws that hold it in place. New seals are available online at a small cost.

The problem could also be with your refrigerator’s thermostat, which is located behind the temperature dial. You can replace this with a few home DIY tools.

If your fridge-freezer has front-mounted digital controls, this is a significantly more complicated problem to repair and should be done by a professional.

Your freezer drawers might also break. Thankfully, you can buy new drawers and replace the unit. It is simply a matter of purchasing the appropriate part for the model you have.

When doing it, be aware that manufacturers sometimes charge a high price for them, so look around to see if you can obtain the one you want for less elsewhere.

Water leaking from the bottom of the fridge.

This could be caused by a clogged drain hole. Water condenses at the rear of the fridge, where it is colder, and runs down into the drain hole.

Dust, grime, and food waste frequently become stuck within, but you can quickly clean it using a small straw, a piece of wire, or a cotton bud.

If this does not work, consider purchasing a special drain hole cleaning tool. A skilled repairer may also use a steam cleaner to go further into the pipe.

If the defect causes your fridge to be written off, you have no other way out other than to get a new unit.

Faulty battery in your vacuum cleaner

All lithium-ion batteries lose capacity with time, although you can easily replace them. A cordless vacuum can only be considered a good buy if its battery is changeable. The bad news is that they can be pricey.

If the battery is not changeable, you don’t have another way out other than to replace the entire vacuum cleaner.

If the battery is replaceable, go ahead and install a new one. You should charge your battery only with the official charger and keep it away from heat to extend its life. Try not to drain the battery entirely. Frequent short charges are preferable for keeping it healthy.

To avoid being left holding a unit that will be cumbersome to own, take your time when making the purchase. As a rule of thumb, only buy a vacuum cleaner with a replaceable battery.

The dishwasher failing to drain as well as it should

The most common culprit is a blocked filter or pump, which you should be able to fix on your own. The pump is found under the filter.

You will need to remove the top and wash the inside. If this does not solve the problem, examine the drain tube at the back of the machine for blockages.

Besides your unit failing to drain as well as it should, it also might have a faulty seal. If your dishwasher leaks slightly, you have a broken door seal. Thankfully, a replacement seal comes cheap.

Another common problem with dishwashers is a faulty electrical system. Professional repairs for electrical issues don’t come cheap, therefore, it may not be worthwhile to fix older or less expensive models. Request a quote from an engineer before deciding on whether to fix your unit or not.

Burners not working in the hob.

If your gas burner does not ignite, it is likely that the spark is not working correctly. If it doesn’t stay lit, it’s because of the thermocouple. Replacing this is a job best left to professionals.

Faults on electric hobs, whether ceramic or induction, are far more difficult to diagnose. Your best bet is to contact an expert or get a replacement.

The touch controls might also fail to work. Problems with the controls will most likely be attributed to the circuit board (PCB), which is hidden beneath the glass surface.

You will need to get a professional quote to replace this. It’s complicated and expensive, so you might be better off replacing the entire unit.

The dishwasher is wobbly and noisy.

Almost all current washing machine drums are sealed shut, so you can’t disassemble them to replace the bearings (the most common source of issues).

This implies you’ll need to replace the entire drum, which is a costly and demanding repair best left to professionals.

You may be better off purchasing a new model because of the high cost. Obviously, you should request a quote before making a selection.

Your dishwasher might also fail to empty the water as well as it should. If your washing machine isn’t draining water properly, take a look at the filter behind the door lock.

Try to clear it out. If that doesn’t work, simply replace it. If it does not solve the problem, the drain pump is most likely the culprit. It is difficult to replace yourself and is not for the faint of heart, so you should hire an expert to help you out.

Parting shot

These are some of the common issues you can have with your appliances. You can fix the unit by yourself, but if the problems are too complex, let an experienced commercial appliance repair Northern VA professional help you out.

As mentioned, always weigh your options and find out whether fixing the problem is worth the cost or if you should simply get a new unit.

Tricks to Make Your Dishwasher Function Optimally

When you purchase a dishwasher, you want it to function at its best, right? And it’s possible with these tricks given by dishwasher repair professionals:

Properly prepare the dishes before putting them in the dishwasher

You can do several things to prepare your dishwasher for proper functioning. These things include:

Secure all plastics. If you don’t, water blasts may force them to roll over and fill with water, or worse, fall into an exposed heating element (if your model has one) and melt them.  You don’t want this, do you?

Never stack items. The water spray will be unable to reach (or clean) the dish sitting on top. Remember that if water cannot reach the dishes, it will not be cleaned.

Always keep stainless steel and silver (or silver-plated) cutlery separate. If the two types come into contact in the wash, a reaction can occur, causing the silver to pit.

If you have not used your dishwasher in a while, turn on the hot water tap. Run it at the nearest sink to guarantee that hot water reaches your dishwasher.

Be cautious what you put in the dishwasher. Items made of wood, such as cutting boards and spoons, cast Iron, valuable carving tools (such as chef’s knives), jars, or containers with glued-on labels, as bits of the labels may fall off and become caught in the filter, and they don’t belong in the dishwasher.

Don’t pre-rinse the dishes.

You should avoid washing your dishes before loading them into the dishwasher. This is because modern detergent is engineered to adhere to the remaining food and clean the dishes properly.

While this is the case, it doesn’t imply you should put your plate in the dishwasher with a half-eaten sandwich on it—unless you want a mushy mess.

Instead, you should scrape large objects off your plate—into the trash or garbage disposal—and place the dish in without rinsing it.

This will not only clean your dishes, but also preserve them in good shape. If no food is adhered to, the detergent may gradually damage your dishware, carving little scratches and pits into the surface.

You also waste water—up to 27 gallons each load, compared to the three to six gallons used by a normal Energy Star-rated dishwasher.

There are certain exceptions to this, of course. With difficult foods such as eggs and oats, dishwashers can’t always perform the job perfectly on the first try.

If you have a casserole dish with very burned-on food residue, it probably makes sense to soak it a little before putting it in your dishwasher.

Place the cookware on the right rack.

You must place the right items on the rack for the best outcome. To help you out, here is a guide to follow:

Plates: Plates belong at the bottom. Lay them so that the dirty side faces the area where the water spray is heaviest, which is normally in the center of the rack. To achieve the best cleaning results, angle pots, pans, and casseroles down.

Place flat pans and platters on the bottom, snuggled along the sides and rear of the rack. Never set them in front of the door; they may prevent the dispenser from opening and the detergent from reaching the dishes.

Store utensils in the basket or lined neatly on the flatware tray. If you’re using a basket, make sure spoons don’t nest together, so arrange some handles higher, and others lower to ensure all surfaces are cleaned.

Forks go up to clean the tines, while knives should be positioned with the blade down for safety. When unloading, grip utensils by their handles to keep them clean.

Glasses and cups: These belong on the top rack. Remember to place glasses between the tines, never on top. The tip of the prong can leave a watermark, and glasses jammed between two tines can fracture.

Angle the cups as much as the rack design allows to prevent water from gathering at the base of the upside-down cups.

Still, got puddles? Unload the lowest rack first to prevent drip-down. And place the wine glasses with care.

To minimize breakage, keep them from bumping into each other or the dishwasher’s top, and ensure they sit securely in the rack. Thankfully, most modern dishwashers include unique stemware holders to keep glassware stable.

Use the proper cycle for the job.

You should be cautious of the cycle you use on your dishwasher. The rapid cycle may be okay if you’re pre-rinsing your dishes, but it wastes more water and time than simply letting the dishwasher do the work.

The shorter cycle is intended for dishes with light soil or those that have recently been soiled. For example, if you have freshly purchased crockery and want it washed for the first time.

Or perhaps you and your companion sit down to dinner and want the dishes cleaned.

For regular loads, you should use the usual cycle.

That is, unless your new dishwasher includes an automatic cycle. The autocycle is intended for a daily mixed load. That’s where the machine’s intelligence comes into play: it analyzes the soil level, recognizes anything left in there, and modifies the cycle accordingly.

If your dishwasher has the intelligence to run an auto cycle efficiently, you can use it for most loads, except for exceptional cases like pots and pans or baby bottles that require the sanitary cycle.

Keep the food trap clean.

Many people don’t know that the dishwasher needs cleaning and maintenance. One area you should pay attention to is the food trap.

It’s in the dishwasher’s base and smells terrible, so people avoid taking it out and messing with it. Depending on how frequently you use your dishwasher, you should clean the trap once every three to six months.

The beauty is that it’s easy to clean even by yourself without involving the services of appliance repair Alexandria professionals.

Home Appliance Best Practises

Would you like to keep your home appliances in top condition most of the time? Here are tips given by appliance repair professionals that will help you do that:

Don’t pre-rinse your dishes. Let the dishwasher run.

It’s time to forget everything your parents taught you about cleaning up after dinner. One of the hardest habits to break for most people growing up in the 1970s and 1980s is not to fully rinse off dishes.

For most people growing up at the time, mothers’ dishes were spotless by the time they went into the dishwasher. This was often because the dishwashers at that time weren’t as efficient as they are now.

Washers today are highly effective and use just a little water.

How little? Three and a half gallons or less is enough

Modern dishwashers are capable of removing dried food off plates, so you can wait until the machine is full before running it. Scraping is sufficient. You don’t need to pre-rinse the dishes. Simply make room for water sprayers to reach each dish.

What if there are only a few dishes to wash? You might have the impression that doing them by hand is less wasteful, but data suggests otherwise, even if you run a half-empty dishwasher.

A peer-reviewed study sponsored by Whirlpool on the amount of water and energy required to wash dishes by hand or machine found that running the tap to wash a plate, cup, bowl, cutlery, and some service items) used approximately 3 gallons.

That indicates that operating the dishwasher for only two people uses less water than washing dishes in the sink, providing no pre-rinsing is done.

Dishwashers produce less than half the greenhouse gas emissions of hand-washing dishes, owing mostly to the fact that they heat less water.

At full capacity, a dishwasher uses less than half a gallon in each setting.

The only way to fight this by hand is to wash and rinse in two basins instead of letting the water run, as most people do.

Unfortunately, this will not save you time. The EPA estimates that hand-washing a household’s dishes for a year takes around 230 hours, similar to a 10-day vacation.

How do the appliances do this? Dishwashers’ light sensors monitor the cloudiness of the water as it drains and regulate the water to guarantee the dishes are clean without wasting it. The whole point is that the appliances do the hard work for you.

Set the refrigerator thermostat and forget about it

The refrigerator was long considered the most energy-hungry appliance in the family home. Today, it is among the most cost-effective.

According to a 2010 World Economic Forum research, refrigerators’ energy consumption has fallen by three-fourths since 1972, despite their increased internal volume. Those stats appear even better today, thanks to improved compressors, coolants, and insulation.

Even with this information, many individuals ignore manufacturer guidelines and set temperatures too low. You should note that colder isn’t necessarily better.

Decades of advancements in insulation, air sealing, and ventilation ensure that suggested temperatures — often between 37 and 40 degrees Fahrenheit can store food the longest without wasting energy or causing frostbite.

Simply set the right temperature and organize your food such that it is easy to find and difficult to forget.

The largest mistake you can make is storing refrigerators past their expiration dates. If you have an old model in your (hot) garage or basement, especially if you’re one of the people with a second refrigerator, get rid of it.

In most cases, you pay more for electricity than you could save by updating it.

Invest in a smart thermostat.

You may have heard that setting your thermostat to a specific temperature reduces heating and cooling costs. It does not, especially if you have to keep changing the settings.

Installing smart thermostats that learn your tastes and behaviors allows you to set an effective heating and cooling schedule while saving money each year.

The smart thermostats employ home WiFi, smartphone apps, or motion sensors to detect when people are home and modify temperatures accordingly, as well as during the day.

Homes with heat pumps are an exception. Modern high-performance heat pumps perform best while maintaining a consistently comfortable temperature and are less efficient when attempting to heat a cold environment.

They can provide energy savings without requiring thermostat adjustments in the evening or when you get up. Don’t touch the thermostat when you have a heat pump in your home.

Replace the old appliances.

If your machine is 15 or 20 years old, replacing it will save you money and reduce emissions. Even today’s low-cost dishwashers outperform high-end appliances from a decade ago.

Pushing appliances beyond their projected lifetime only delays their replacement, wasting money and energy.

While this is the case, manufacturers say that we may be entering an era in which appliances reach their peak efficiency. At that point, we’ll rely on software updates rather than new hardware to enhance things.

Appliances are getting about as efficient as they can be. There are projections that it will get to the point where manufacturers will be helping consumers prolong the life of their products.

While this is a probability, we are yet to get there. If your appliance is old, you should simply replace it. A telltale sign that your unit is old is if it consumes too much energy.

You should also consider replacing your unit if it keeps breaking down, and you have to keep hiring commercial appliance repair Alexandria professionals.

When buying a new unit, get a high-quality one that will withstand the test of time. The appliance should have a high energy rating which gives you peace of mind that it won’t hike your energy bills.

Tricks to Prevent Scratches On Your Glass Stove and Instead Keep It as Good as New

Installing a new glass stove top and seeing it sparkling and in perfect shape is a terrific sensation. Sadly, this look will not last with regular use unless you take tremendous care of the unit.

Before you realize it, spills will burn onto the surface, and scratches will accumulate in the burner rings.

To avoid this problem, cooktop repair professionals advise that you must be able to do more than just clean a glass stove. The good news is that you can make changes to avoid future scratches and blemishes.

To help you out, here are the best ways to maintain your glass stove and keep it looking like new.

Use the right cookware.

You need to use the right cookware for your stove. This refers to the material of the pan’s base, which ideally should be stainless steel.

Because of its flat surface, stainless steel is ideal for use on glass stovetops and has enough weight to keep it steady when cooking.

This is not to claim that switching to stainless steel will prevent stove top scratches, but it will be gentler on the surface.

Be cautious when handling the pans.

First and foremost, never drag your pans across the glass surface when cooking; instead, always raise them.

Most people ignore this cardinal rule when they shake and combine the cooking ingredients. You should know this is the primary reason your burners have zig-zag scratches and are all pointing similarly.

Even if you’re using a lightweight pan, the base will scratch and pit the surface as it drags, so avoid it. Be cautious when gently lowering your pans onto the stove. You should note that slamming them down can scratch or even fracture the glass. You don’t want this, do you?

Keep the bottom of your pans clean.

Many people overlook the bottom of their pans when cleaning them. This is wrong. Stains on the underside are often baked in and impossible to remove. Second, many believe that since the food isn’t contacting it, it doesn’t matter. Actually, it does.

If your pan has stains and residue baked into the base, it will be much simpler to scratch and damage the stove’s glass surface.

In extreme cases, it will impede your skillet from transferring the heat evenly while food cooks. It can also generate unpleasant scents as it heats.

To clean the base of a pan, apply a baking soda paste and water across the surface. Allow it to sit for 20 minutes before scrubbing it away with a non-abrasive sponge or old toothbrush.

Clean the stove regularly.

Get into the practice of cleaning your stove top after each usage. Of course, you should do this once it has cooled down. Wiping down the surface immediately removes any spills or crumbs that may bake-on or catch under your cookware, causing more scratches.

Remember to clean your stovetop as needed thoroughly. For general guidance, do this once a month; however, if you notice burn marks emerging around the elements, it’s time for a cleaning.

Keeping your stovetop clean will extend its life, but only clean it after it has cooled.

Be cautious of cast iron cookware.

Cast iron deserves special mention because while it is an incredible material for cooking, it is incredibly heavy and may damage glass stove tops significantly.

Take particular caution while laying your cast iron cookware on the surface, and avoid dragging it over the glass – the weight will increase the likelihood of significant scratches.

Get a stovetop cover.

There are stove top covers available in the market that you can use to protect the surface when not in use. These are also useful if you have limited countertop space because the top of the stove can then act as an additional room.

Some mats are safe to cook directly on if you have an induction glass stove. These mats decrease scratching and heat exposure from the pan to the glass surface, allowing the stove to last longer.

Keep in mind that these mats should not be used on a conventional electric glass cooktop since these surfaces heat up far faster than induction, which would burn most mats. Consult the manufacturer for help and guidance on how to use them.

Are there pans that can’t scratch the stovetop?

The unfortunate truth is that any pan can scratch your glass cooktop. You may avoid scratches by choosing a style with a smooth base, such as stainless steel, but you should still be cautious when using it.

Enameled or ceramic pans have a particularly smooth finish that helps prevent scratching. However, how you utilize the pan is as crucial.

Never drag it across the surface; instead, lift it and softly settle. Also, wipe the underside regularly to prevent residue from burning to the base and harming your stove.

Consider the weight of your kitchenware as well. A weighty item, such as a larger work or one of the greatest cast iron skillets, might scratch more easily due to its weight. These can crack the surface when not handled properly, so proceed cautiously.

What should you do when the stove scratches?

Your glass stove top should still function normally with minor scratches. Still, if it is chipped or cracked, you should stop using it and contact an appliance repair Springfield professional to replace it.

If you want to reduce the look of the scratches, try cleaning the surface completely as recommended by the manufacturer, or follow the above instructions for cleaning a glass stove if none are provided.

Many marks are charred residue, and a scraping tool can help significantly. Carefully scrape off the marks, and you are good to go.

When hiring a professional to replace the unit, take your time and hire an experienced one who knows what they are doing. The last thing you want is someone who does a shoddy job, and you must repeat it.

6 Ways to Prevent Ice from Building Up in Your Fridge During Winter

Virginia Refrigerators Repair

As winter approaches, many people feel that they will face the regular issue of ice buildup in their refrigerators and freezers.

You should note that ice buildup not only affects the efficiency of your appliance but it can also lead to food spoilage and increased energy consumption. You don’t want this, do you?

Fortunately, there are simple and practical solutions to this freezing issue. In this post, we’ll look at six practical techniques to keep your fridge and freezer ice-free over the winter months, ensuring that you keep off a refrigerator repair professional, have your appliance performing optimally, and your food stays fresh and well-preserved.

These tips might help you have a stress-free winter, whether you’re a culinary aficionado or simply want to keep your equipment operating optimally.

Remove the excess ice buildup.

To begin dealing with excessive frost and ice, empty your fridge and freezer compartments. Set the thermostat to the highest temperature and leave some towels handy to absorb extra water.

Ensure all the compartments are dry before reinstalling your food and altering the temperature.

This simple procedure will guarantee that your refrigerator remains frost-free and performs at peak performance.

Adjust the temperature

You need to regularly check the temperature of your refrigerator and freezer. Keep your refrigerator between 35 and 42 degrees Fahrenheit and your freezer close to 0 degrees Fahrenheit for best results.

You should note that frost or ice may form if temperatures dip below these temperatures. To ensure the fridge is at the proper temperature, you must place the fridge thermometer in the right place.

Position the thermometer at the center of the refrigerator for the most accurate reading. Some fridge thermometers stand alone, while others can be hung on a shelf. You should place your fridge based on its design.

If you have a stick-shaped thermometer in your fridge, submerge it in water.

Because the warmest position in your fridge is usually near the door, it can be a suitable alternative location for your thermometer.

For peace of mind that your fridge is at the proper temperatures, you must regularly monitor the temperatures.

Your thermometer will need some time to calibrate to the correct reading. So keep the door closed as much as possible to maintain a steady temperature.

To tell the accurate temperature,  check the thermometer the next day to see if anything has changed.

If there are changes, adjust the unit.

Place the fridge correctly.

How you place your fridge can have a significant impact on ice formation. 

You should be cautious and place your fridge in the right place. As a rule of thumb, do not put the refrigerator in your kitchen if it doesn’t have an exhaust system.

Instead, select a location that offers enough clearance from the wall to ensure appropriate cooling for the refrigerator’s compressor.

Reduce the frequency at which you open the fridge and freezer doors

Frequent opening of the door raises the humidity levels inside your fridge and freezer, which can lead to ice buildup and frost.

With this in mind, avoid leaving your fridge or freezer doors open while determining what to eat or which ingredients to pull out.

Instead, prepare a fast mental list of what you’ll need and get everything out at once.

If you have a two-door fridge, open only one door at a time. You should close the doors as quickly as possible in under one minute to prevent as much humidity from getting in as possible. 

For example, combine the eggs, butter, and milk if you’re baking. You only have to open the door once this way.

If you have trouble remembering what’s in your fridge, keep a list of what’s inside posted on the fridge door. This way, you don’t waste time figuring out what is there and what isn’t.

Ensure you have a tight seal.

You should regularly inspect the seals on your refrigerator and freezer doors for air leakage symptoms, such as damp or frozen areas.

If a problem arises, you can use a simple process to replace the gasket.

The door seals are the long rubber strips that run around the edges of your door to keep cold air out.

If you notice cold air around the exterior of your fridge door or any visible damage, repair the seal to prevent your fridge from constantly running or warming up.

Close the door on a dollar bill to see if the fridge door seal is tight. Your seal remains intact if you encounter resistance when removing the dollar note. If it readily falls out, it’s time to replace them.

You can do the replacement if you have the skills, but if you have never done it before, let an expert help you.

You should note that the seals lining your fridge or freezer doors will not close correctly if they are caked with food residue or ice crystals.

Working on one door at a time, quickly scrape the inside of the seal with a damp cleaning cloth and mild dish soap.

Clean the frame of the refrigerator opening so the seal may sit flush against it. Wipe away any lingering wetness with a dry cloth before closing the door.

Ensure no moisture remains, as this could form an ice crystal.

Keep your fridge clean.

For the best fridge efficiency and ice frosting reduction, regularly clean your refrigerator’s cooling fan, vents, and condenser coils. You can remove the ice buildup with a hot, soapy cloth, pressing against frost and repeating until entirely melted.

You can do the cleaning without the help of an appliance repair Springfield professional, but if you notice a significant problem, such as the fridge giving off odors after cleaning, let an expert help you.

It can be tempting to deep clean a refrigerator using bleach and other chemical cleansers, but you should avoid it because bleach can damage surface materials and possibly release harmful toxins into your food.

To stay safe, use gentle dish soap and food-grade pantry staples like white vinegar and baking soda. This way, you can clean the interior of the fridge without risking chemical contamination or structural damage.

How to Use a Dishwasher Correctly to Save Energy and Money

Studies have shown that dishwashers are four times more water efficient than hand washing, with the most water-efficient full-sized dishwasher using nearly ten times less water to wash the same quantity of dishes as hand cleaning.

While this is the case, you could spend more energy, time, and money washing your dishes when you improperly use your dishwasher. To help you out, here are some of the ways recommended by dishwasher repair professionals to use your dishwasher to save energy and money:

Don’t prewash the dishes.

This is an age-old mistake that many people continue to do. You should note that there is no need to rinse dishes into the dishwasher, no matter how dirty they are.

Apart from wasting water, rinsing plates beforehand will stop the dishwasher sensors from working correctly as they measure how much dirt is in the water after the initial cycle.

So, when there isn’t much dirt on the dishes, they won’t work hard, so they won’t properly clean your dishes. 

Dishwasher detergent tablets work best when there are food particles to allow them to do their work. This means that when you pre-rinse the dishes, the detergents don’t work properly, so they don’t clean the dishes as well as you would want them to. 

Instead of pre-rinsing the dishes, scrape the extra food particles and let the dishwasher do the rest. 

Load and unload the dishwasher correctly.

Overfilling and placing dishes in the wrong area or at an improper angle may prevent the dishwasher from washing your dishes effectively.

The best way to load your dishwasher is by placing large things like plates on the bottom tray, followed by cups and utensils on the top. 

You should separate items so there is space between them to allow the jets to wash. This includes separating the cutlery so the water can reach all areas.

You should make sure that nothing is preventing the spray arms from turning freely. Place the cups and bowls vertically so that the water can drain off properly, and they can dry.

The same way you need to load the dishwasher properly is how to unload it properly. 

Unload the dishwasher’s bottom rack first. The reason for this is that during a cleaning cycle, top rack cups and bowls can sometimes pool water.

This means moving them first will result in a spill and splash of water on the clean dishes below. And you don’t want this, do you?

Run the dishwasher when full.

Running a dishwasher with only a couple of dishes loses electricity and money in the same way that leaving your washing machine half full wastes energy and money.

Compared with hand-washing in the sink, dishwashers are highly water-efficient, but to get maximum efficiency, you should wait until the dishwasher is completely loaded.

This means you will be wasting energy and water by running it half-empty.

A full dishwasher will also have superior drying performance due to its higher thermal mass. 

Dishes are also more likely to smash and bump into one other when loads are partially full, increasing the danger of damage and breakage. So, always take your time and wait until you have enough dishes before you run a cleaning cycle. 

Use the right temperature.

Eco-mode exists for a reason—to save electricity. While you may be put off by the idea that it may take longer to wash your dishes in this setting, the fact that it pumps around more times means that less water needs to be heated, and your dishes will be washed for longer.

A standard dishwasher setting is usually between 55oC and 65oC, however, the lower eco temperature could consume 20% to 40% less energy. This helps you save money. 

If your appliance lacks the handy eco button, consider purchasing one that does.

Run a vinegar cycle.

At least once a month, fill a bowl with white vinegar and place it on the top rack of an empty dishwasher to run. The purpose of doing this is to give your dishwasher a refresh.

When you do this, it is like giving your dishwasher a spa treatment, as it will neutralize odors and break down grime.

When your dishwasher is clean, it not only properly cleans the dishes, but also runs efficiently, saving you energy. 

Leave the door open after use.

Your dishwasher, like your washing machine, has a moist atmosphere and fragile rubber door seals.

If you close the door tightly, your seals won’t get a chance to dry out, which promotes mold growth and foul odors.

After running a cycle, leave the dishwasher door open. This will expel any lingering moisture, which will help the machine last longer.

Don’t put everything in the dishwasher.

As much as you should run the dishwasher when full, it doesn’t mean that you should throw everything inside. 

As tempting as it is to throw everything in the dishwasher, some objects need to be dishwasher-compatible.

As a rule of thumb, don’t throw cast iron and nonstick pans in the dishwasher because it will remove the nonstick coating.

Also, don’t throw wooden spoons and chopping boards inside, as the hot water in the machine might break the wood and ruin the coating.

Placing plastic goods in a dishwasher, unless labeled “dishwasher safe,” isn’t wise, as the heat will melt them. 

If they are dishwasher safe, pop them on the top shelf only.

Also, don’t put sharp knives in the dishwasher as the dishwasher will gradually dull them.

Use the right detergents.

Some dishwasher detergents contain abrasives that quickly dull or wear away fragile glassware.

To stay on the safe side, commercial appliance repair Northern VA recommends that you use a detergent with a rinse aid to guarantee a thorough cleaning and drying.

Unlike hot air dryers, modern dishwashers dry with hot water. The rinse aid in the detergents allows the water to slide off the tub and dishes and down the drain. As a result, you don’t use too much water.

A tell-tale sign you use the wrong detergent is if you have spots on your glasses. If that’s the case, get a new detergent. 

Signs Its Time to Hire a Refrigerator Repair Professional

Without the fridge, you wouldn’t freeze quick and simple meals, wouldn’t be able to store perishable items for an extended period of time without canning, and would have to consume everything at once because you couldn’t save leftovers. This is a hard life, right?

All of these advantages will disappear if your refrigerator breaks down. To ensure this doesn’t happen, you should pay extra attention to how the fridge works.

When you do this, you can catch your fridge before it breaks down and schedule refrigerator repair service before it completely breaks down.

To catch your fridge, you’ll need to be alert for warning indications that your refrigerator is nearing its end and take prompt action when you see them.

Some of the signs you should look out for include:

The fridge failing to cool the food

The sole function of your refrigerator is to cool food items, so if it’s not doing that, you have a problem you should fix as soon as possible.

Feel the refrigerator’s internal temperature by putting your hand inside and waving it around a little. Opening a refrigerator door should feel immediately cold; if not, there may be an issue.

To determine how much cooling is occurring, try prodding the food or other items in your refrigerator.

A great item you can use is butter. If a stick of butter is not kept at the ideal cold temperature, it will soften rapidly.

If the fridge isn’t cooling as well as it should, contact a professional to fix it.

The food is getting spoilt.

Food is refrigerated only for long-term preservation. Any food in the refrigerator should last for at least a few days.

Of course, this depends much on what it is and how long you can keep it there.

If the food expires within a day of being placed in the refrigerator, it indicates that there may be one or more issues with the fridge.

While inadequate cooling is typically to blame, there are other possible reasons. In addition to insufficient cooling air, the fridge’s motor, door seal, or other components could be the source of the issue.

It just takes a slight temperature decrease to push your leftovers into the danger zone, even though the fridge appears cold and the motor appears to be working.

High condensation

There might occasionally be some condensation on the inside of the refrigerator due to the temperature difference between the inside and outside.

This is normal as long as it’s limited to the fridge’s solid surfaces, such as the shelves and compartment doors.

While this is the case, you should be concerned if you notice condensation on your food or outside the refrigerator door.

Only in temperature-contrasting situations, such as the windows of your car or house, should condensation occur.

Your refrigerator may have a breach in the body or door seal, allowing warmer air to enter if there is excessive condensation inside.

The same is true for the door’s exterior; if there is a gap in the door seal, cool air escapes and drips onto the door.

This condensation can cause the refrigerator to get wet on the inside and outside, and the motor will start overworking to compensate for the lost cooling, which could result in high power consumption.

To prevent this problem, have it checked by a professional and fixed immediately.

Excess frost

Despite popular belief, the freezer section of your refrigerator should be covered only partially in ice. Your freezer should be at a constant temperature that prevents water vapor from entering, known as a dry cold.

If you start to notice a lot of ice in your unit, it indicates that your freezer needs to be properly regulated.

You should keep your freezer at a constant temperature that prevents water vapor from entering, known as a dry cold.

Therefore, it indicates that your freezer needs to be properly regulated if you start noticing a lot of ice.

A malfunctioning freezer door seal or an issue with the refrigerator’s internal temperature control mechanism could cause this.

Food in your freezer risks freezing into an ice prison if it is icing over. It might not indicate impending danger, but it’s something to watch out for.

Depending on your fridge’s make, model, and year of manufacture, you can physically defrost it with an ice scraper or run an internal defrosting program.

Hot or loud motor

Your refrigerator’s motor does all of the cooling work. The motor drives the evaporator coils, which distribute the cool air that keeps everything nice and frosty. The motor in your refrigerator may get a little warm, like any motor, but this is normal.

The motor is most likely going to fail when it becomes scorching hot. The motor operates above its recommended capacity when it produces high heat, which might lead to unexpected shutdowns.

Your fridge’s motor can make weird, loud noises and be hot. The motor normally makes a quiet humming noise whether the door is open or closed.

If the noise becomes louder and begins to splutter, buzz, or hiss, it may indicate that the motor is being overworked.

Feel around the engine by reaching the rear of the refrigerator if you can. It’s on its last legs if it’s hot and/or making a lot of abrupt rumbling.

Hiring a repair professional

When hiring an appliance repair Springfield professional, ensure that the professional you hire is experienced and knows what they are doing.

The last thing you want is to hire someone who causes more problems than they are there.

While fixing a faulty appliance is good, sometimes it might not be a solution. If your unit is old, you should get a new one.

Dishwasher Mistakes You Should Avoid Making

Your dishwasher has one job: to turn a messy kitchen full of plates, bowls, cups, and utensils into a rack full of gleaming clean dishes. ​

More than half of the households in the United States with dishwashers use the equipment at least once a week, and there’s a strong probability that most are making some frequent blunders. ​ ​

To have an easy time with your appliance and ensure that it lasts for a long time, you need to avoid these frequent dishwasher blunders.

Avoiding the mistakes will also keep a dishwasher repair professional away, clean your dishes, and extend your appliance’s life. ​​

Failing to read the labels

Many people using their dishwasher for the first time have the impression that they can put anything inside. This is wrong as the dishwasher might end up harming your dishes instead of cleaning them. 

The drying cycle’s heat may harm wood utensils like cutting boards, making them crack or warp. The dishwasher will dull sharp knives and blades for food processors and other kitchen units. ​

Before using the dishwasher, ensure the item you put inside is safe. 

You should be cautious against putting stemware or other delicate glass in the dishwasher. The reason for this is that not only are the glasses at risk of breaking, but the broken glass can cause havoc on the equipment. ​A shard of glass could get caught in the pump and cause damage.

If any of the units you are looking to clean aren’t dishwasher safe, handwash them. 

Pre-rinsing the dishes

Avoid running a scrub brush across your plates before loading them into the dishwasher. Although 75% of homeowners admit to pre-rinsing their dishes, the habit can backfire, especially when you overdo it. ​

The soap you use needs to bind to little food bits and sauces. Food particles almost act as an abrasive to assist the soap in knocking loose [foods] that are a little more baked on. ​

Prerinsing eliminates food pieces, which might cause detergent to bond to the porous surfaces of the dishes instead, leaving a film on your plates. ​ ​

Skipping the rinse saves more than just time. Rinsing the dishes before filling the dishwasher uses up to 20 gallons of water — before you even turn on the machine. 

Even if the food is caked on, using the dishwasher’s rinse feature consumes significantly less water than rinsing the dishes under the faucet to soften and remove extra food. ​ ​

Instead of pre-rinsing the dishes, scrape off the extra food particles. 

Improper loading

How you load your dishwasher affects how it works and interferes with cleaning.

For the best outcome, you need to load your appliance properly. 

Put silverware in flatware baskets or racks; spoons and forks with the handles facing down. You should load the knives with the handles facing up to avoid blade injuries.

Plates and bowls belong on the bottom rack, while glasses and mugs go on top. Load your glasses between the tines of the rack, not on top of them. ​​

Putting the glasses over the tines can cause spotting or stress on the glass, and you could end up with broken glasses. ​ ​Spatulas, serving spoons, and other large utensils are best when hand-washed rather than placed on the top rack. ​

Water pressure will move the food items, and they can block the spray arm if they fall. And if something gets in the way, you’ll only be washing a handful of dishes for the duration of the cycle.

Putting detergent in the wrong place

Dishwasher detergent, powder or liquid, is placed in the dispenser, but there is considerable controversy about where to place detergent pods. ​

Many people think they should put the detergent pods into the bottom of the dishwasher rather than in the dispenser. This is wrong. 

The reason for this is that dishwashers have separate rinse and wash cycles. When you put the detergent pod in the bottom of the dishwasher, the soap is flushed down the drain before the wash cycle begins.

The best way to go about it is to check when the manufacturer recommends it. 

Overloading the dishwasher

Don’t approach your dishwasher like a Tetris game, stacking and balancing as many dishes as you can on the racks. This is because you often need more time to overload the machine. ​

Whenever you overload a dishwasher, you’ll first notice that your dishes will have a lot of soap scum or haze. 

This is because having too many dishes prevents them from receiving enough water flow to rinse them thoroughly.

To avoid overloading your appliance, consult the user handbook for your dishwasher. Dishwashers vary in capacity and layout, so it’s critical to understand what your unique model can handle.

When loading the dishwasher, use the dishwasher’s racks and compartments to distribute the dishes evenly. 

Place plates, pots, and pans on the bottom rack, while glasses, cups, and other smaller objects are on the top rack. Ensure that the sprayer arms on the dishwasher can freely revolve.

Ignoring the manual

There’s no disputing that information on dishwasher parts and features, as well as the filtration system, isn’t fascinating to read, but scanning the handbook — or at the very least keeping it available — is important. ​​

It’s an amazing resource for troubleshooting information, detergent and rinse agent recommendations, and phone numbers for service or advice. 

Have you already discarded the manual? You can get the manual online by entering the manufacturer’s name and model number. ​​

Find the manual and always use it whenever you doubt how to use the machine or fix an issue properly. 

Ignoring the filter

Most homeowners are unaware that their dishwasher has a filter, but it’s there. It’s under the dishwasher’s bottom rack and needs some cleaning. ​

Check the appliance manual for cleaning guidelines for your dishwasher filter. Then, take it out, rinse it with water, and clean it with a wire brush to remove any calcification before returning it. ​

It only takes a few seconds and will make your dishes cleaner. ​ 

Ignoring problems

Even the best-maintained appliances break down. Many homeowners ignore minor issues, which is wrong. This is because the minor issues worsen to the extent that the appliance stops working. 

To avoid this, you should keep your eyes out for the issues, even the smallest ones. If you don’t have the repair skills, get in touch with experienced appliance repair Alexandria professionals. 

Parting shot​

Reading the handbook, reconsidering how you load the dishwasher, where you put the detergent, and how you manage maintenance can improve the appearance of your dishes while also extending the life of your device. ​

Avoid the above mistakes, and you will be on your way to an optimal functioning appliance. 

Tips to Saving Energy with Your Washing Machine

With rising energy costs, considering energy-efficient solutions when choosing home appliances, including washing machines, is becoming increasingly vital. If you already own the appliances, there are several tips you can put into place to ensure that your appliance consumes as little energy as possible.

Some of the tips given by appliance repair professionals you can put into place include:

Choose the right washing machine.

Choosing an energy-efficient washing machine is critical because it will result in lower energy bills. Before you head to the stores, take time to understand the energy efficiency rating because it indicates the appliance’s energy and water usage, which will be reflected in your bill.

The amount of energy consumed by a washing machine every cycle is indicated by its energy efficiency rating. The water usage is displayed on the energy label based on an average of 220 cycles per year for the Eco 40-60 cycle, a pre-programmed wash setting on the machine.

The energy efficiency rating system considers the energy used in a cycle, the capacity of the drum, and the amount of electricity used.

The label also shows the average power consumption, and the yellow EnergyGuide badge, which shows the expected annual operating cost. You should consider these aspects when choosing an energy-efficient washing machine because they will assist in saving energy and lower power bills.

When shopping for a washing machine, pay attention to the type you want. Two major types of machines you can buy are top and front-loading.

When choosing a washing machine, it is critical to weigh the benefits and drawbacks of both types. Front-loading washing machines use less water and power, produce better cleaning outcomes, and cause less fabric damage. The downside is that they are more expensive and require more maintenance.

On the other hand, top-loading washing machines are faster and more ergonomic, although they may use more detergent and be less energy efficient.

You should analyze both models and choose the one that best meets your requirements.

Optimize your wash settings.

Adjusting the washing settings of your appliance is critical for lowering energy usage and saving money on utility costs.

You should be cautious of the load size that you put in your appliance.

Reducing the loads and the amount of water used can help save energy significantly. You should decide on the best load size for a washing machine by reviewing the manufacturer’s manual. While this is the case, always ensure you fill the washer.

When loading your appliance, you should note that limiting the frequency with which garments are washed can significantly impact energy usage. Thankfully, you can implement measures to reduce this, including wearing clothing more than once before washing and only washing filthy items.

Choosing a proper wash cycle can be beneficial in terms of energy efficiency and cost savings, as well as ensuring garment longevity. A cold cycle is the most energy-efficient washing cycle that you can go for, with savings of up to 80% in energy use and cost.

When choosing a wash cycle, consider the type of clothes and the degree of soiling. It is also a good idea to reference the care label on the garment for particular recommendations.

You can use strategies to increase the efficiency of the wash cycle by washing full loads, using high-efficiency detergents, and avoiding excessive amounts of detergent.

The temperature of the water is critical to the efficacy of detergent and its ability to remove stains and bacteria from clothing. Water heating is expected to consume up to 90% of the energy in a hot water wash cycle. This represents a considerable portion of total energy expenditure.

As a result, it is recommended that you use cold water for the bulk of washing cycles, as this is the most energy-efficient alternative. If you prefer to wash in hot water, update to an energy-efficient, front-loading washing machine.

Other ways to keep the washing machine clean include:

  • Wiping down the drum and door gasket after each use.
  • Leaving the door open to allow air circulation and drying.
  • Running a cleaning cycle with vinegar or a washing machine cleaner at least once a month.

Keep your appliance in top shape.

Of course, you should take good care of your washing machine so that it functions optimally and lasts for a long time.

You should clean your washing machine regularly to prevent the accumulation of dirt, grime, and bacteria, which can cause unpleasant odors and even damage the machine.

Running an empty cycle on hot with two cups of white vinegar instead of detergent is one of the most effective ways to clean the washing machine.

To remove difficult stains or sludge, use a bleach-based mold cleanser or a nylon brush and vinegar to scrape the interior of the wash drum.

Other precautions include:

  • Wiping down the door and gasket after each use.
  • Leaving the door open between washes.
  • Using high-efficiency detergents.

Another way to ensure that your appliance is always in top working condition is by regularly inspecting and replacing worn-out parts. You should inspect the drive belt, rubber door gasket, and counterbalance springs and change them as the manufacturer directs.

Always unplug the washing machine and remove the back panel to inspect and replace the drive belt. Similarly, unplug the washing machine and open the door to inspect and replace the rubber door gasket.

Unplug the washing machine and remove the front panel to inspect and replace the balancing springs.

You can do the inspection and replacement independently, or you can hire washer repair Northern VA professionals to help.

Many people wait until their appliances develop problems to pay attention to them. This isn’t good. The best way out is to schedule yearly inspections even if your appliance functions optimally.

When your appliance develops problems, regardless of how minor they are, don’t hesitate to fix them, hoping they will go away. Instead, move with haste and fix them before they worsen.